Switching between plan tiers requires the purchase of a new plan. There are two methods for purchasing a new plan:
- We can place the order for you via ticket.
- You can purchase the plan via our website.
Place your order through a ticket.
Please open a billing support ticket if you want us to place a new order. In your ticket, we need you to confirm the following: Primary domain, whether you want to transfer or register your domain (see notes in step 3), and your Preferred Billing Cycle.
Place your order through our website.
Website orders start on our web hosting page.
-
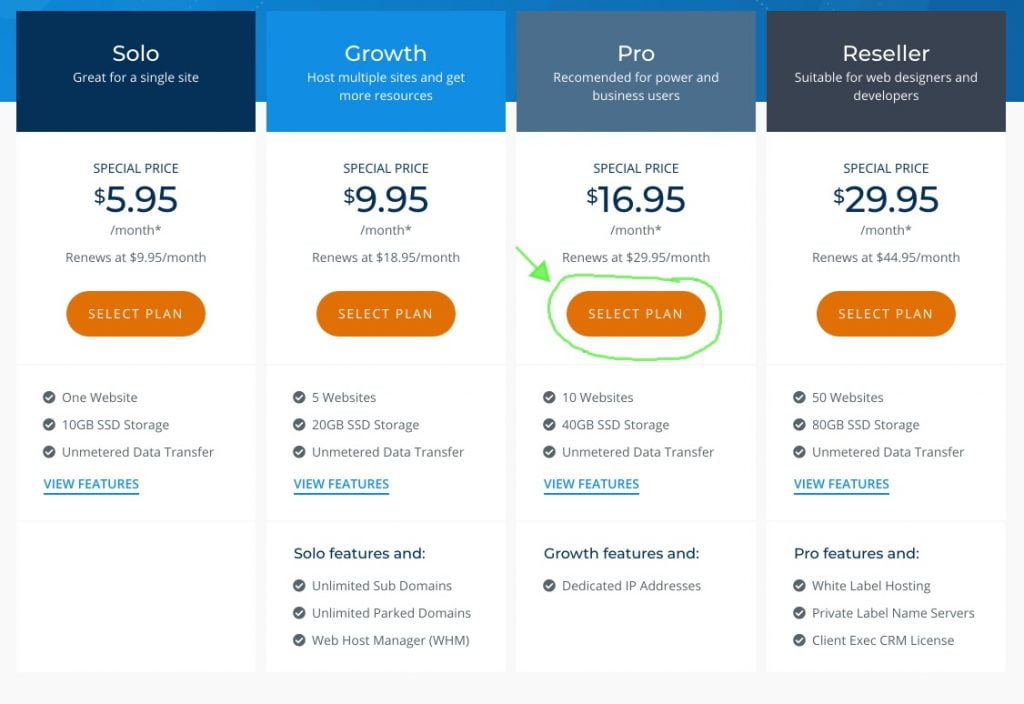
Choose your preferred hosting plan.
If you don’t know which plan to choose, we can suggest one via support ticket.
-
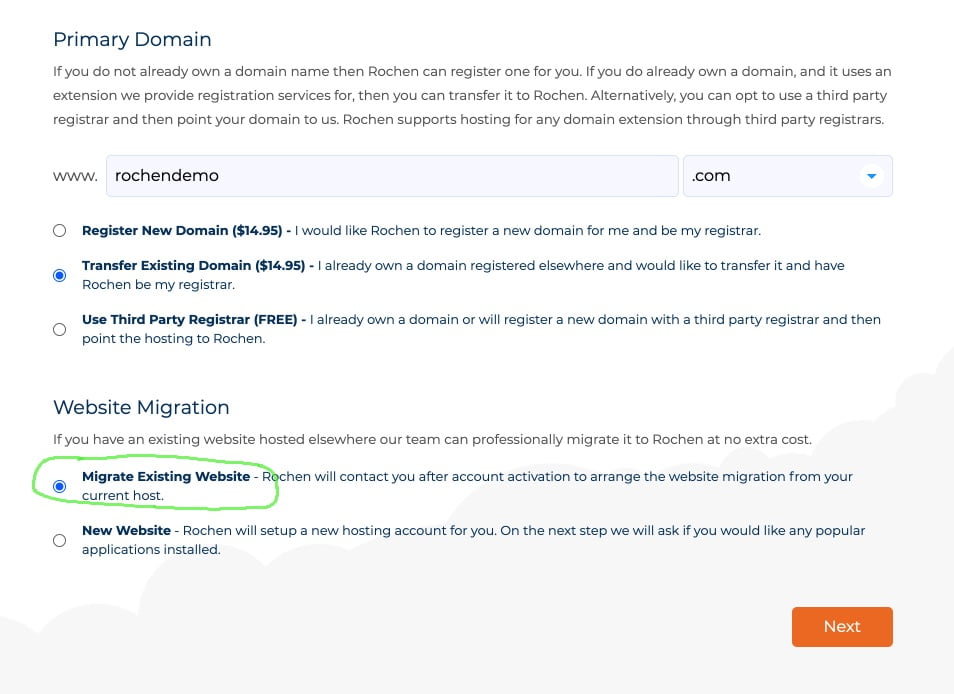
Enter your primary domain name.
Use the same primary domain as your current hosting plan. This does not affect your live website in any way.
-
Choose a domain option.
Indicate whether to transfer your current domain name registration from your existing registrar or leave your current domain name registration with your existing registrar.
-
Choose a migration option.
The Migrate Existing Website option opens a ticket with our team. Don’t worry if you miss this step; when you’re ready to schedule the migration, you can let us know in a new or existing ticket.
-
Select your region.
Hosting is provided through our UK and US datacentres. Our website defaults to your nearest option, but if you want to change the default, you can:

-
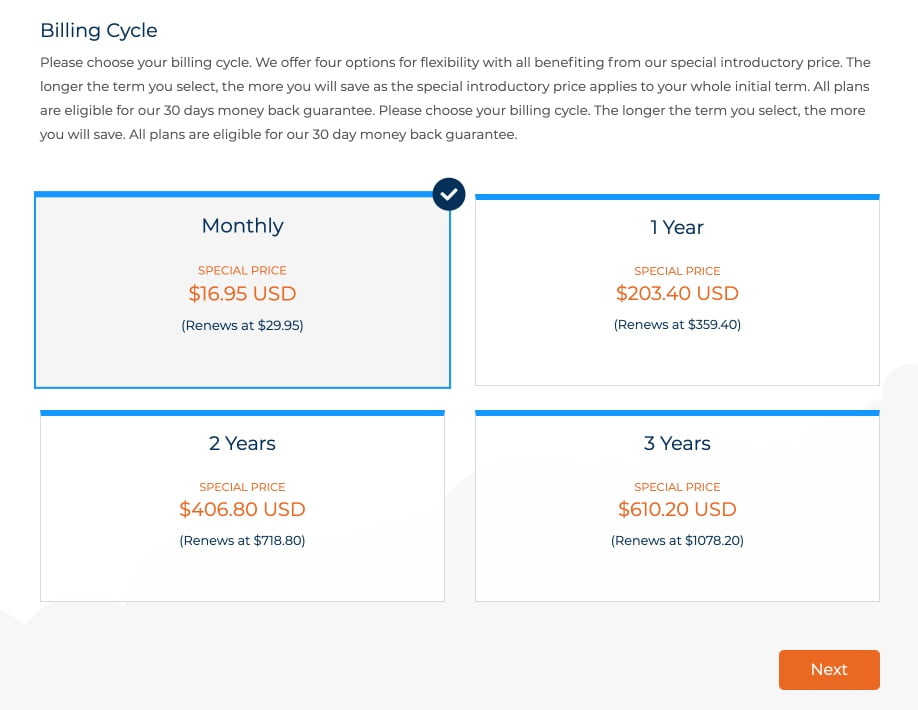
Choose your billing cycle.
Introductory rates apply to the first billing cycle, and recurring rates apply to the remaining billing cycles. Prices are detailed here. Choose the option that works best for you.
-
Complete your purchase.
Log in to add your new plan to your current account. You can do so at the top of the left panel. A successful login sends your contact and billing information to our checkout; you shouldn’t need to fill anything out manually. If you need assistance with your password, please see this article.
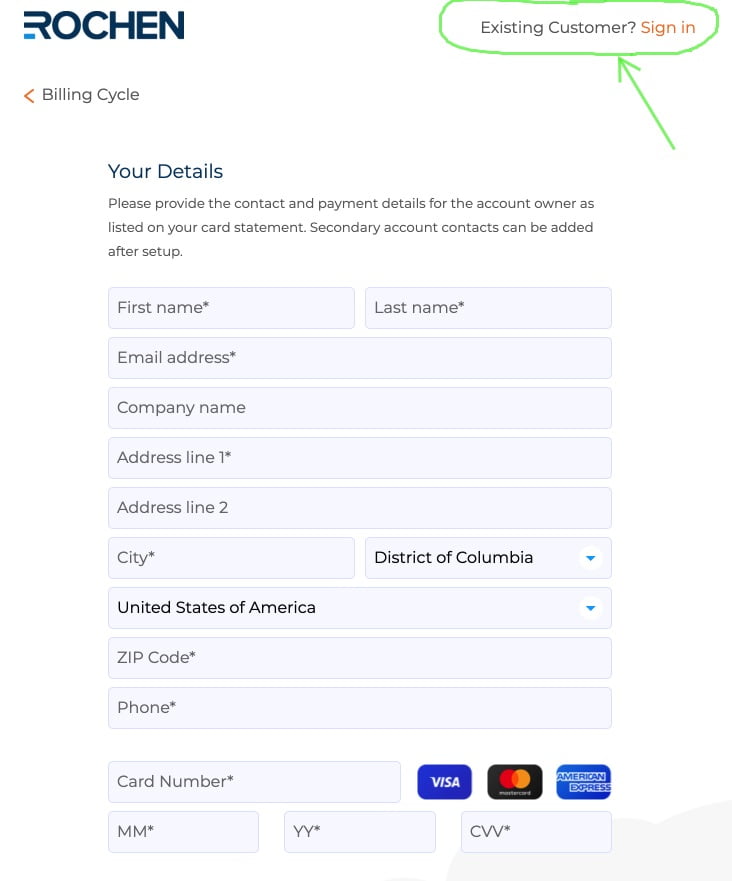
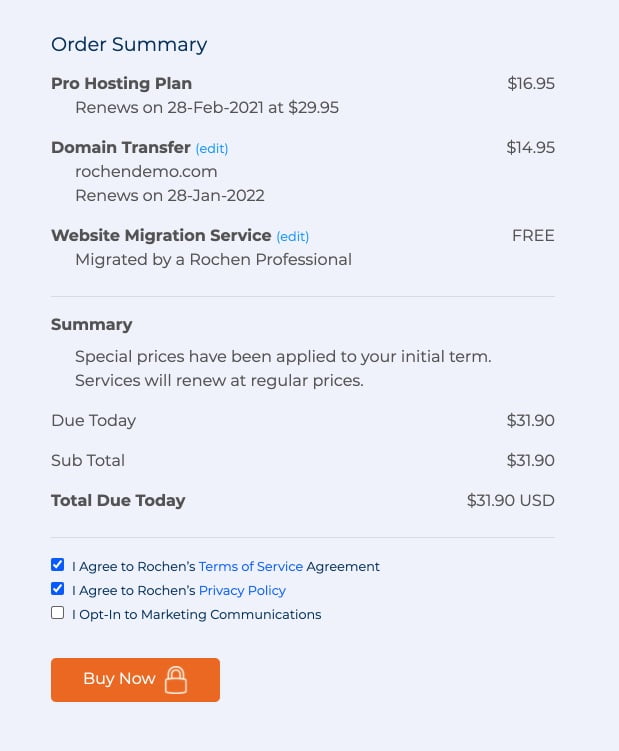
- In the last step, please review all information, agree to our Terms of Service and Privacy Policy, and click the Buy Now button when ready.
What happens next?
When your new hosting plan is purchased, please confirm via a support ticket that we can migrate your data from your old hosting plan to your new one. We migrate everything, including website files, databases, and email accounts. We ensure everything is optimally configured on the new plan to prevent interruptions.
When your data is migrated, we update your ticket with instructions about your nameservers. If your domain registration is handled through your Rochen account, you can update them via these steps.
If you use third-party registrar services, please get in touch with them to update the nameservers.
Allow up to 48 hours for DNS to propagate after your nameservers are updated (though it commonly occurs much faster than this.) Once confirmed that your domain is pointing to the plan/server, requesting cancellation for your old hosting plan is safe.
If you have any questions, please open a support ticket so we can help.