Rochen Documentation
  • Home
  • Hosting
    • Web Hosting
    • WordPress Hosting
    • Joomla Hosting
    • Managed Cloud Servers
  • Docs
  • Blog
  • 24/7 Customer Support
  1. Home
  2. Hosting Plan Information
  3. 2020 Reseller Hosting Plan
  4. Add a Package via My Rochen
  1. Home
  2. Hosting Plan Information
  3. Growth Hosting Plan
  4. Add a Package via My Rochen
  1. Home
  2. Hosting Plan Information
  3. Pro Hosting Plan
  4. Add a Package via My Rochen
Searching...

Add a Package via My Rochen

Contents
  1. Package basics
  2. Getting started

This article outlines how to add a hosting package and applies to the Growth, Pro, and 2020 Reseller plans only. Please see this article to add an account to a Premium Web Hosting plan. For legacy Reseller plans, please start here

Package basics

Our Growth, Pro, and 2020 Reseller plans allow you to directly add individual cPanel accounts (sub-accounts) for each website via the My Rochen interface. Using the method outlined here, you can also do this via Web Host Manager (WHM).

To add a cPanel account, you must first assign it a package. A package determines how much storage the new account will have.

Let’s look at the easy steps for handling this via the My Rochen interface.

Getting started

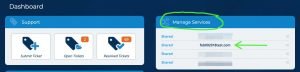
The first step is to locate your hosting plan via the Manage Services section of your My Rochen account. Manage Services can be accessed via the left-side navigation and the main panels on the dashboard, as illustrated below: 

Side Navigation Main Dashboard

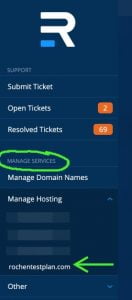
Once you have selected your hosting plan, follow along with the following images: 

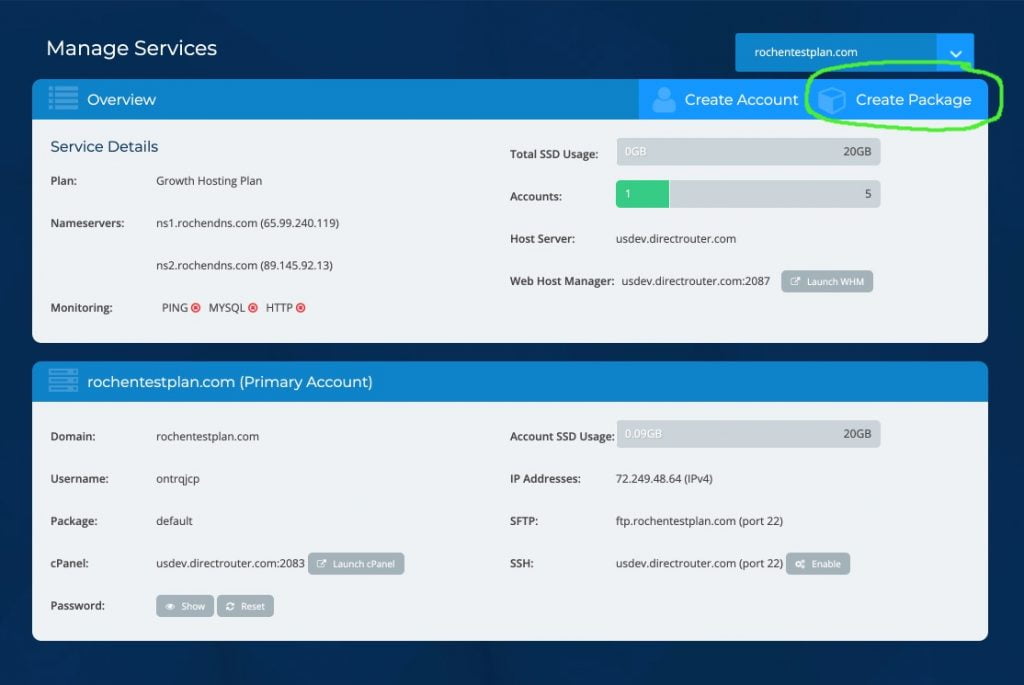
  1. Create Package Button – Locate the create package button in the top panel of your hosting plan view and click on it:  
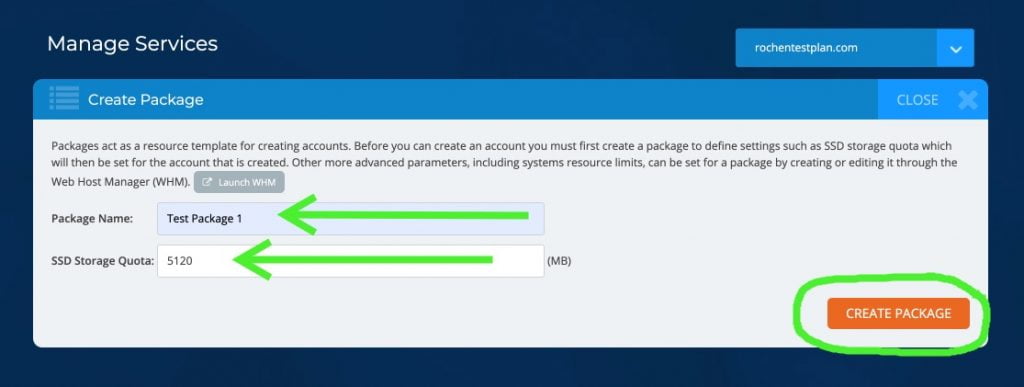
  2. Next, you want to name your package and set your storage limit. 
    • Naming – It’s best to pick something you can re-use for multiple sites or clients. eg “[yourdomain] Lite Hosting”, or [yourdomain] Medium Package”, etc. 
    • You can set the storage limit for your package up to the amount of storage allocated to your hosting plan. You can always increase storage for individual clients or change their package later. Usually, 1GB to 2GB should be a good starting point for most small websites. 
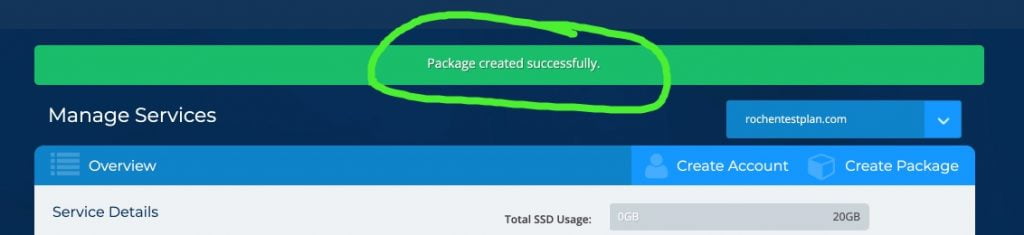
  3. Once your package is created, you should see a ‘success’ message displayed at the top of your screen: 
  4. That’s it! You can now create more packages and add new cPanel/sub-accounts for the individual websites you’ll be hosting within your Rochen plan. 
Updated on December 13, 2022
Tagged: cPanel accountcreate accounthosting packageresellersub-accountwhm

Was this article helpful?

Yes No

Related Articles

  • Hosting Plan Features Comparison
  • Switching Between Plan Tiers
  • Legacy Pricing for Shared Hosting Plans
  • Add a Website to your Hosting Plan
  • Updating Nameservers at Rochen
  • Import with Softaculous for Local Sites
Need Support?
24/7 support is available through the My Rochen portal.
Login

Contents

  1. Package basics
  2. Getting started

Popular Articles

  • Site Booster Resource Upgrade
  • Transferring a Domain Name to Your Rochen Account
  • Automatically Delete SPAM Messages
  • General Billing Support Information
  • Create a MySQL Database Through cPanel

Need Support?

24/7 support is available through the My Rochen portal.
Login
WordPress Hosting Joomla Hosting Drupal Hosting Magento Hosting
© 2022 Rochen Limited. All Rights Reserved. Prices Exclude VAT. Legal
  • Home
  • Hosting
  • Docs
  • Blog
  • 24/7 Customer Support