This article will walk you through the process of adding, and managing, secondary contacts in your My Rochen customer account.
Secondary contacts are a good idea to have set up, securely, if your account is for a company that has multiple people who need access to the account information and services. Additionally, some people like to add a contact for emergency purposes in the event that they are personally unable to manage the account and someone to be able to handle things on their behalf.
In the My Rochen portal, you have the option of adding “email only” secondary contacts. These are contacts who will receive automated email reminders about ticket updates, or billing notifications, but they will not have their own login to access the account.
The other secondary contacts are those who have their own login and select permissions.
We will go over each option in more detail below.
To start,
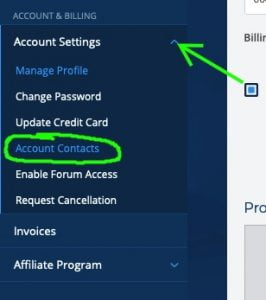
- Log in to your account at https://my.rochen.com and go to “Account & Billing -> Account Settings -> Account Contacts” in the left side navigation:
Adding Email Only Contacts
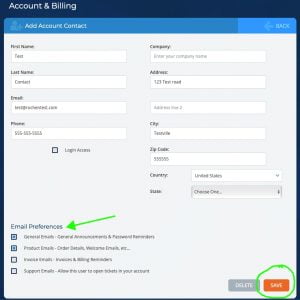
To add a contact who will receive email notifications in regards to account events (support ticket replies, billing reminders, etc), Follow these steps:
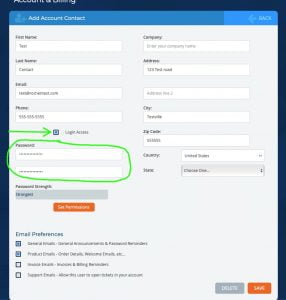
- Fill out the contact’s information and then, towards the bottom, select the type of email notifications that they should receive. Then click on “Save Settings”.
Secondary Contacts with Login Access
In this next section, we will go over adding a login and select permissions for secondary contacts. It is important to choose your secondary contacts very carefully. We recommend never assigning the permission of “Modify master account profile” to any secondary contact.
- To start, enter the contact’s details as shown in the above graphic.
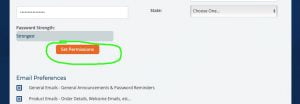
- Once that is done, click on “Set Permissions”
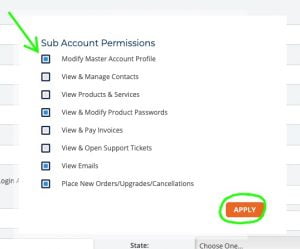
- This will bring up a window with a list of permission you can select for your secondary contact. We recommend keeping peoples’ permissions limited to their area of responsibility, and never providing the “Modify Master Account Profile option” unless it’s appropriate (an equal partner, for example). Once you have selected all of the necessary permissions, click on “Apply”:
- Now that your permissions have been set, it’s time to enter a secure password:
- Double-check everything, and then click Save at the bottom to complete the process.
- Your new contact has been added, and you can provide them with their secure password.
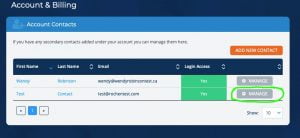
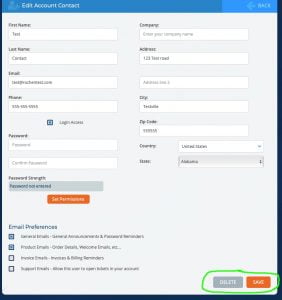
Modifying and Deleting Contacts
- Simply click on the Manage button beside the contact from the list in the “Account Contacts” section:
- If you’re modifying your contact, make the necessary updates and then click on Save. If you wish to delete a contact, simply click on Delete.