This article outlines the steps to create a staging site in your Rochen cPanel account.
What is a Staging Site?
A staging site allows you to duplicate your live site (e.g. rochenrocks.com) to a staging location (e.g. staging1.rochenrocks.com), make changes, test new themes or modules, and push those changes back to the live site.
Staging sites are useful for web design agencies or developers who frequently change code and content. But they are also easy for any user to create. They are an excellent tool for individuals managing personal or small business websites because they ensure no downtime when doing updates.
In your Rochen cPanel account, you can create a staging site via Softaculous.
Log in to cPanel
- Log in to your Rochen cPanel account.
- You can access cPanel with these urls in your browser: https://yourdomain.com:2083 or https://yourserver.directrouter.com:2083
- Enter your cPanel username and password on the login screen. You can find them through your secure account at https://my.rochen.com in the Manage Services section.
Create a staging site
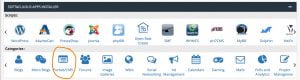
- In cPanel, scroll down to the Softaculous Apps Installer, and click any icon.
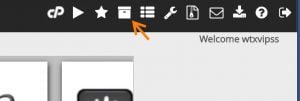
- Go to the top right and click the file box icon:
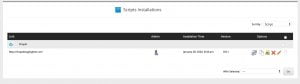
- Existing installations will be listed here.
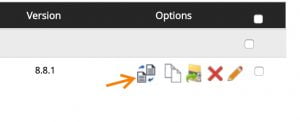
- Click the Staging icon.
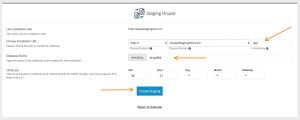
- Now you have some optional settings:
- Your staging site must be installed into its own directory. Choose a directory name, enter it in the box, or leave the default. For this example, we chose to name our directory dev.
- You can also choose a database name. We left the automatically generated name of “drup864” for this example.
- You can edit cron settings, too. However, if you’re unfamiliar with cron jobs, we recommend leaving the default. Or open a ticket to ask for guidance.
- Click the Create Staging button.
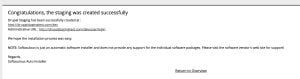
- Your staging site is ready to use.
- You can use your staging site to test modules and themes and make code changes. When you’re ready, you can clone your dev site back to your root to override the live site and put your dev changes in place.
Please note: In some rare cases, if you use a script/plugin that uses hard-coded pathing, you may need to manually update the associated configuration file(s) to reference yoA staging site allows you to duplicate your live site (e.g. rochenrocks.com) to a staging location (e.g. staging1.rochenrocks.com), make changes, test new themes or modules, and push those changes back to the live site.
Staging sites are helpful for web design agencies or developers as they ensure no interruptions to the live website. But they are also easy for any user to create and convenient for individuals managing their personal or small business websites.ur new install. If you log in to your account over SSH and change directories to your install, you can use a command like “grep -Ri ‘<oldpath>’ ~+” (where <oldpath> is your original site location) to look for any files that may require adjustment. Please open a support ticket with us if you encounter any difficulties or need assistance.