As a Rochen customer with a WordPress site, you have an excellent administrative tool called WP-CLI (WordPress Command Line Interface) already preinstalled. WP-CLI makes performing day-to-day WordPress management tasks much easier and with reduced server load under your hosting account.
We’re going to show you how to use a few WP-CLI commands to effortlessly backup and restore your WordPress files, folders and content. This process can also be extremely useful for moving WordPress sites between servers or hosting accounts.
How to backup your WordPress files and folders with SSH
In order to use WP-CLI, you will need to have an SSH client installed on your computer. In addition to having an SSH client installed locally on your computer, you will also need to ensure SSH access is enabled for the site you wish to manage through the My Rochen customer portal, and then connect to your WordPress site via SSH. By default, SSH is disabled for added security.
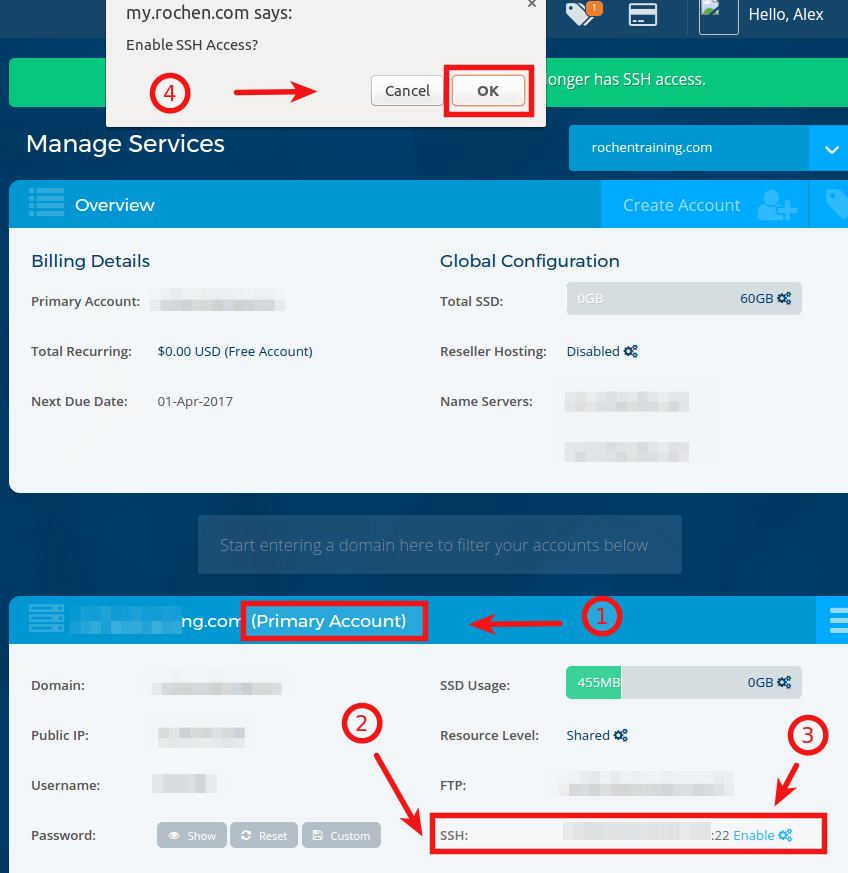
Step #1. Enable SSH access via My Rochen:
- Log in to your account through the My Rochen Portal
- Find the “Managed Services” link in the left sidebar and then click the “Shared Hosting” link
- Click the primary domain for the account of the WordPress site you wish to enable SSH for
- In the “Primary Account” section (or secondary account if the WordPress site you wish to enable SSH for isn’t the primary) (1) find “SSH” (2), click on “Enable” (3) and then click “OK” (4) within the popup confirmation box:
Step #2. Establishing an SSH connection with your WordPress site
- To start using WP-CLI to manage your WordPress site, you need to connect to your Rochen hosting account for the site using your SSH client.
- If you are a macOS or Linux user, you already have such a tool built-in into your operating system. For Windows users, we recommend installing a free SSH client like Putty.
- Once configured open your SSH client and connect to your WordPress site using SSH by running the following command:
ssh <your_rochen_hosting_username>@<your_domain_name>
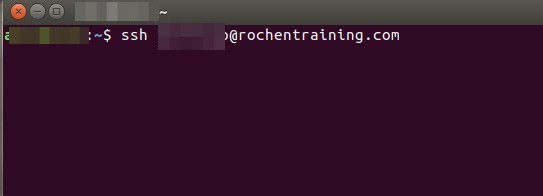
- Next, enter the same password you use to login to your WordPress site’s cPanel and hit “enter”. That’s it. You are now ready to work on your WordPress site using the WP-CLI command line tool over SSH
Note: The cPanel username and password for each of your sites can be found within the My Rochen customer portal or reset at any time as shown in the above screenshot.
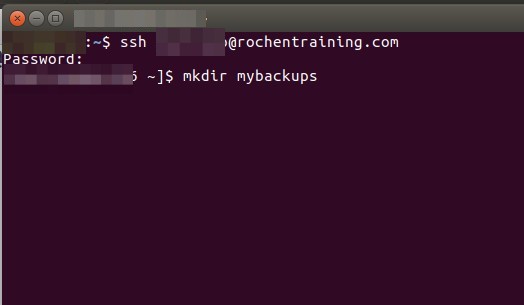
Step #3. Backup your WordPress files and folders.
For security purposes, it is recommended not to store sensitive data like backups within a web accessible directory. By default on Rochen’s hosting platform this is the “public_html” or “www” directory. To store your future backups securely outside of the web accessible public_html folder, we recommend creating a directory, for example, “mybackups”, outside it.
- To create such a directory, in your SSH client run the following command:
mkdir mybackups
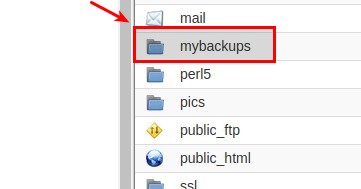
If you wish to verify successful creation of the new directory outside of “public_html” you should now see the new directory at the same level as “public_html” within the account root using cPanel’s file manager or any SFTP client:
- To backup your WordPress site’s files and folders and store them in this new directory, use the backup ‘tar’ command:
tar -vczf ../mybackups/mybackupfilename.tar /home//public_html

Let’s take a look at this command in more detail.
-c: Create my backup archive.
-z: Compress the archive with gzip.
-v: Display progress in the terminal while creating the archive, also known as “verbose” mode. The v is always optional in these commands, but it’s helpful.
-f: Allows you to specify the filename of the archive.
../mybackups/mybackupfilename.tar: Store my WordPress site backuped files and folders inside the “mybackups” directory and call the backup file mybackupfilename.tar.
/home//public_html: path to the WordPress files and folders to be backuped.
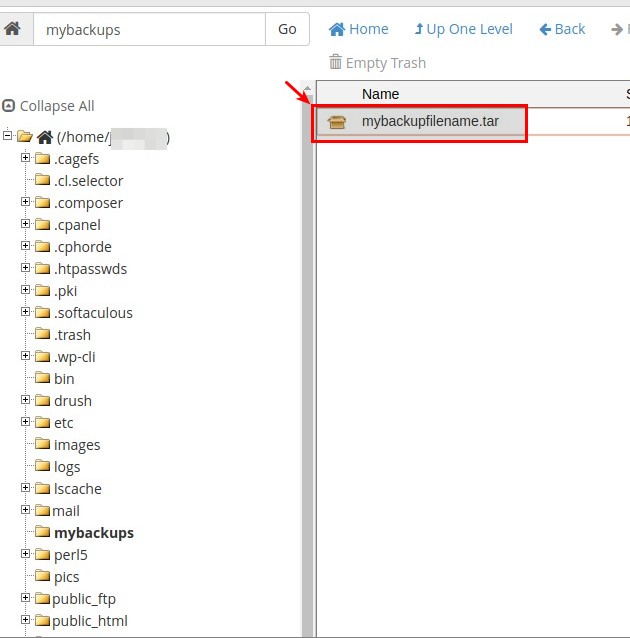
If you now take a look inside of your “mybackups” directory, you will see this backup archive file: mybackupfilename.tar:
How to backup and restore WordPress content with WP-CLI’s ‘export’ command
If you are familiar with the “Export” feature in the web-based WordPress administrator dashboard to backup WordPress pages, posts, comments, custom fields, and tags, then WP-CLI allows you to do the same over the SSH command line.
WP-CLI often allows for such tasks to be completed quicker and in the case of larger sites with less server load on your hosting account than with the web-based alternative. You can use WP-CLI commands only from inside the folder, where you installed your WordPress site. In this example case, this is the “public_html” directory. Let’s move to that directory.
- Run the following command:
cd public_html
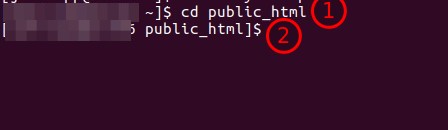
- Once this command executes (1), you will now see the “public_html” directory name appeared to the left of the $ sign (2).
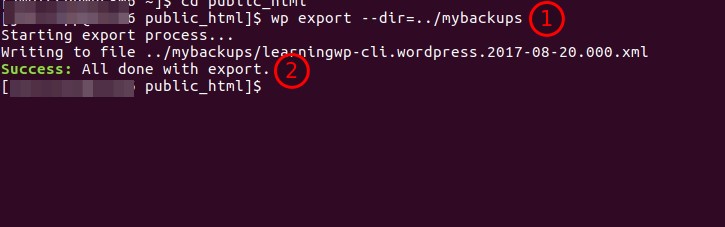
- To create a backup of your WordPress site content using WP-CLI, and securely store it in the “mybackups” folder, simply type the following command in the SSH client window:
wp export –dir=../mybackups
- Once this command (1) has finished running, in the SSH command line prompt you’ll see this message “Success: All done with export.” (2):
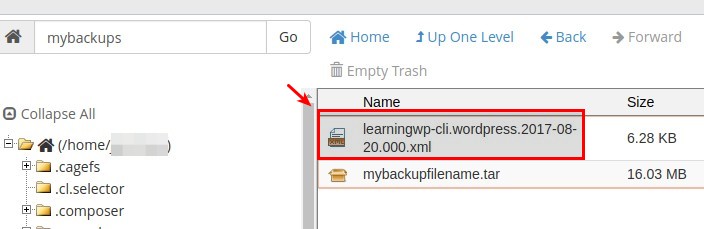
WP-CLI will also create a .xml file. The filename will be similar to the example in the image below: learningwp-cli.wordpress.2017-08-20.000.xml:
WP-CLI ‘export’ command options and filters
To allow you fine tune your WordPress content backup, the WP-CLI ‘export’ command offers some options and filters.
You can choose to export only content written explicitly by a certain writer, or created during a certain period of time. You could also choose to export only content with specific ID numbers, or content without comments. To do this, use the ‘export’ command options and filters. Let’s have a look at some examples.
Examples of running WP-CLI ‘export’ command with options and filters
Example #1. Export posts, published by the user ‘joedoe’:
wp export –dir=../mybackups –user=joedoe
Example #2. Export posts, published by the user ‘joedoe’ from 1 January 2017 to 1 March 2017:
wp export –dir=../mybackups –user=joedoe –start_date=2017-01-01 –end_date=2017-01-03
(please note that the start and end date filter format is YYYY-DD-MM)
Example #3. Export posts (and skip their comments), published by the user ‘joedoe’ from 1 January 2017 to 1 March 2017:
wp export –dir=../mybackups –skip_comments –user=joedoe –start_date=2017-01-01 –end_date=2017-01-03
Example #4. Export all posts with status “Pending”
wp export –dir=../mybackups –post_status=pending
Example #5. Export all posts, pending in the category “News”
wp export –dir=../mybackups –post_status=pending –category=news
How to restore WordPress content
To be able to restore WordPress content from a previously created content backup .xml file, you first need to install the “WordPress Importer” plugin. To do this, just run the following WP-CLI command within your SSH client:
wp plugin install wordpress-importer –activate
Now you are ready to proceed to import:
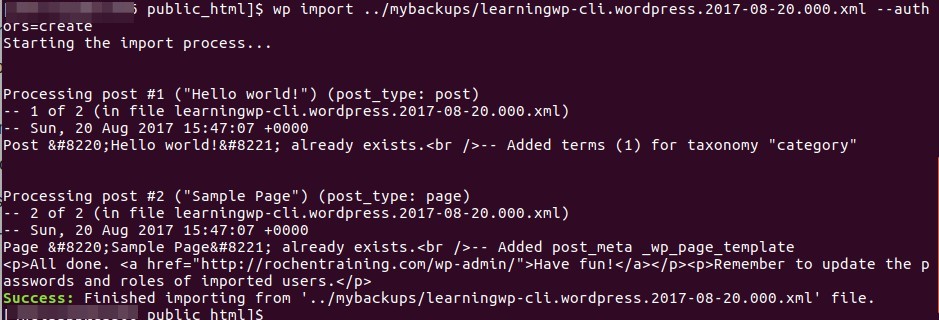
wp import ../mybackups/learningwp-cli.wordpress.2017-08-20.000.xml –authors=create
Once your ‘import’ command finishes, in your SSH command line prompt you should see the success message:
Conclusion
You now know how to use SSH and WP-CLI to effortlessly backup your WordPress files, folders, and content.
As a Rochen customer, the WP-CLI tool is already preinstalled with our WordPress hosting and ready for you to run your backup tasks. Having a backup archive of your WordPress site files and folders and backup XML file of your WordPress content securely stored, you are now well prepared in case needed
This method can also be used for moving a WordPress site over to Rochen from another server. It should be noted though that we offer free transfer services for up to 10 sites if you’re coming to Rochen from another server running the cPanel control panel software. Simply open a technical support ticket after signing up.
Do you still have any queries on how to use SSH or WP-CLI to backup or restore your WordPress files, folders and content? If you do, please feel free to ask for help through the My Rochen customer portal or if you’re not already signed up through [email protected].