Let’s Encrypt is a free SSL certificate service with your Rochen hosting plan. This article covers using Let’s Encrypt SSL via AutoSSL in cPanel.
When you add a domain to an existing cPanel or create a new cPanel account, AutoSSL runs automatically and secures your site with a free SSL certificate.
Important note about DNS
Your domain’s DNS must already be pointed for a seamless Let’s Encrypt SSL via AutoSSL setup. As such, we recommend that you update your domain with Rochen nameservers at your registrar before adding the domain to your account.
If you can’t assign your nameservers first, don’t worry. Once your domain resolves to the account, you can still check the status or run AutoSSL on-demand via cPanel.
Let’s start!
Let’s Encrypt via AutoSSL Setup in cPanel
1) From cPanel, navigate to the Security section and choose SSL/TLS Status.

2) Notice the list of your domains and the AutoSSL status for each.
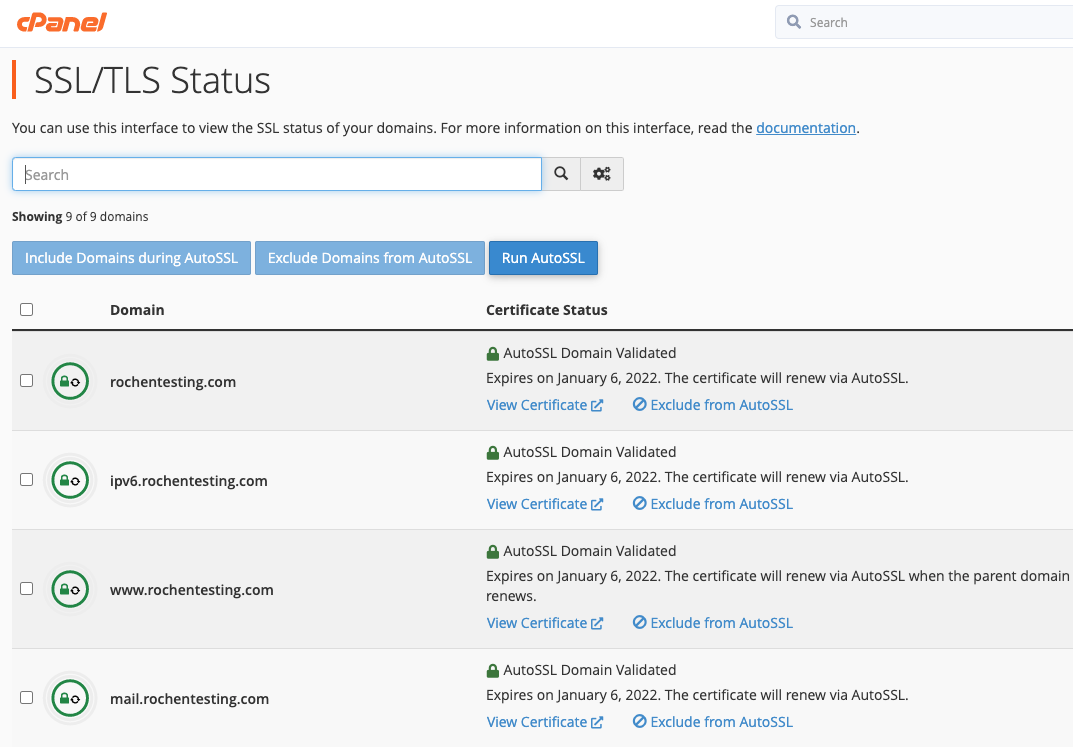
3) Subdomains you wish to access via HTTPS, or use with your email client, must have a green lock status and read ‘AutoSSL Domain Validated.’
The Certificate Status side of the page will note any problems securing a subdomain in the last AutoSSL run.
You can click Run AutoSSL any time to secure a domain that has been recently pointed. Subdomains that do not resolve to your account should be excluded by clicking the ‘Exclude from AutoSSL’ link. This will prevent unnecessary ‘SSL renewal warning’ emails for those domains.
Troubleshooting Let’s Encrypt SSL via AutoSSL
If you are unable to access your site over HTTPS, but the SSL/TLS Status page doesn’t indicate any issues, you can use an online checker to confirm the SSL has been successfully applied.
We recommend the following checker. It offers a basic test but allows you to specify the TCP port you want to check. https://ssltools.digicert.com/checker/views/checkInstallation.jsp.
For example, entering ‘rochentesting.com:443’ (domain:port) checks regular HTTPS access for web browsing.
If you want to verify that the SSL is working correctly for IMAP and SMTP, then you can specify ports 993 or 465.
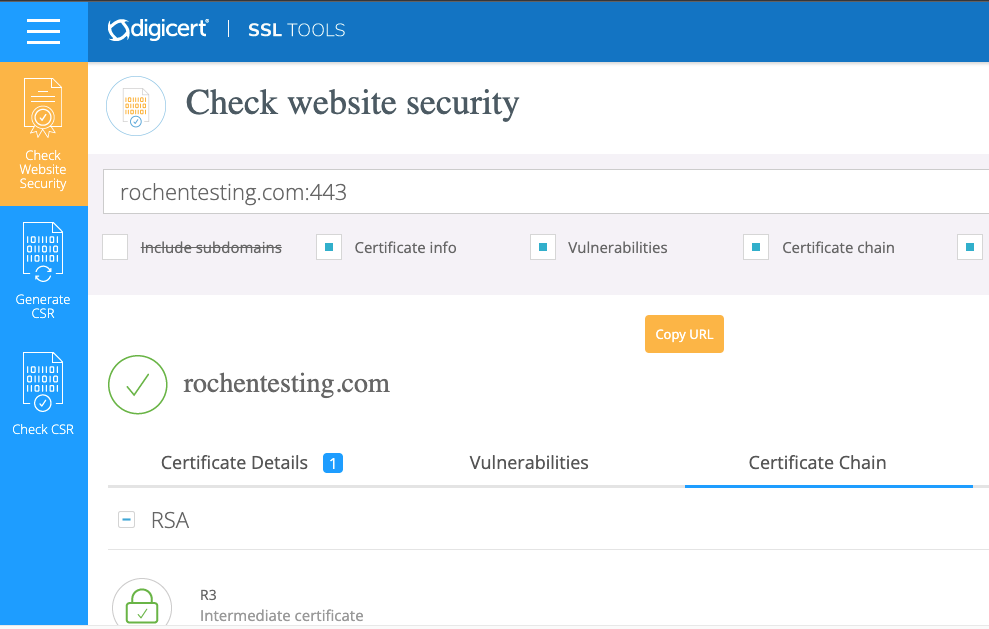
On the Certificate Chain tab, ‘R3’ is the intermediate used by Let’s Encrypt.
Re-installing a Certificate
A manual update is a possible solution if you’re having a problem with the certificate chain.
A quick tool for viewing and downloading recent SSL certificates for your domain is available at https://crt.sh/.
1) Enter your domain in the Search field.
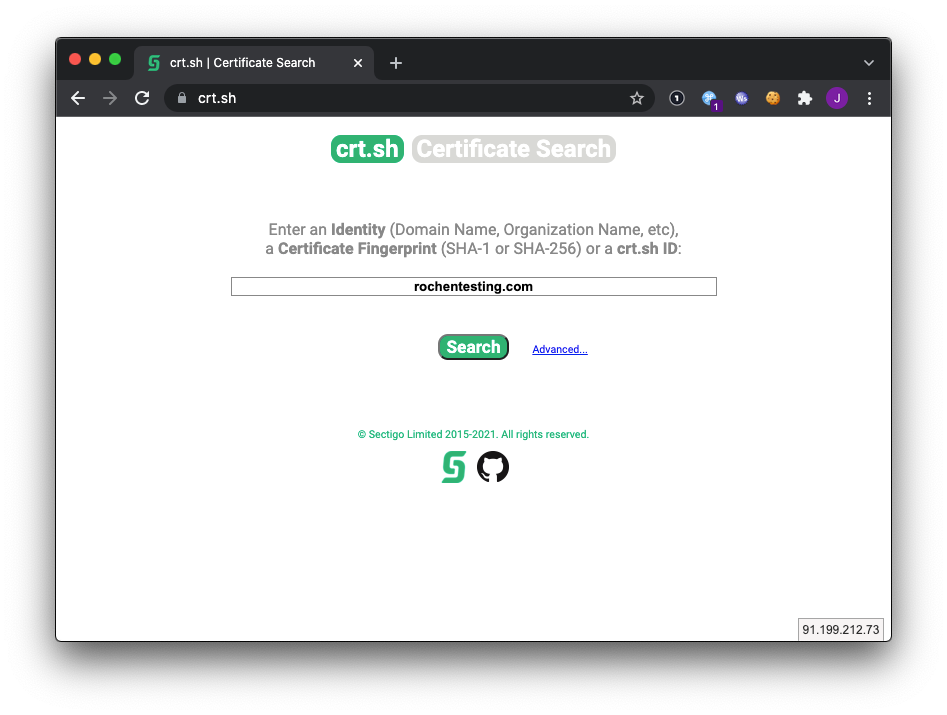
After entering your domain, the site will provide a historical log view of its SSLs. The most recent entry is at the top of the page and is likely to be the SSL that you want.
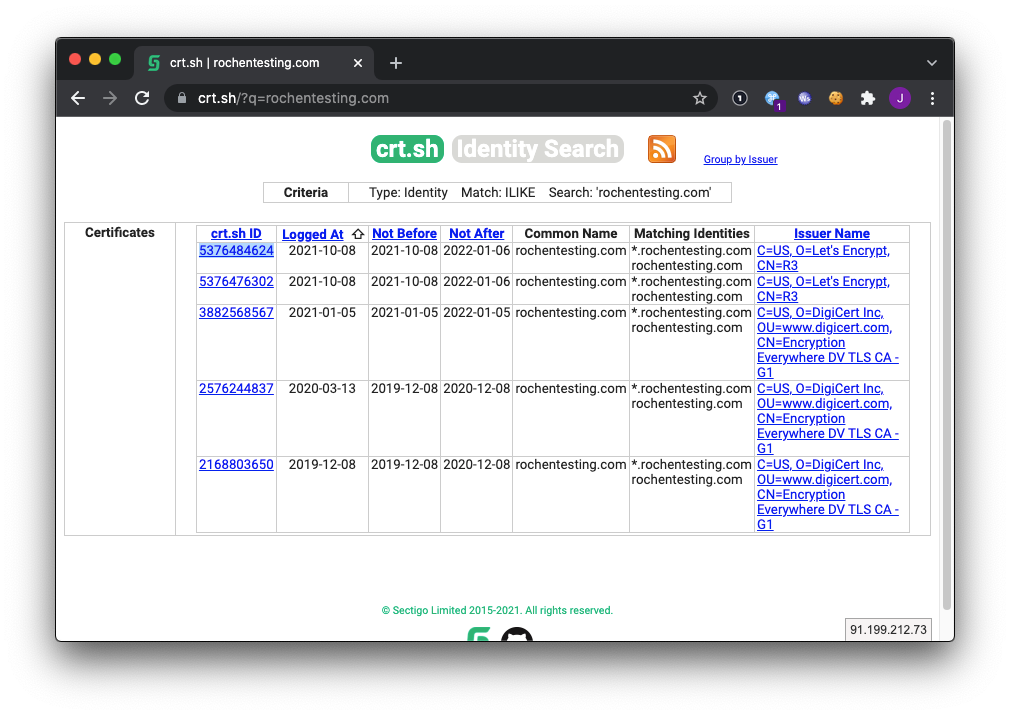
2) To see extended information about the certificate and have the option to download it, click the link under the crt.sh ID field.
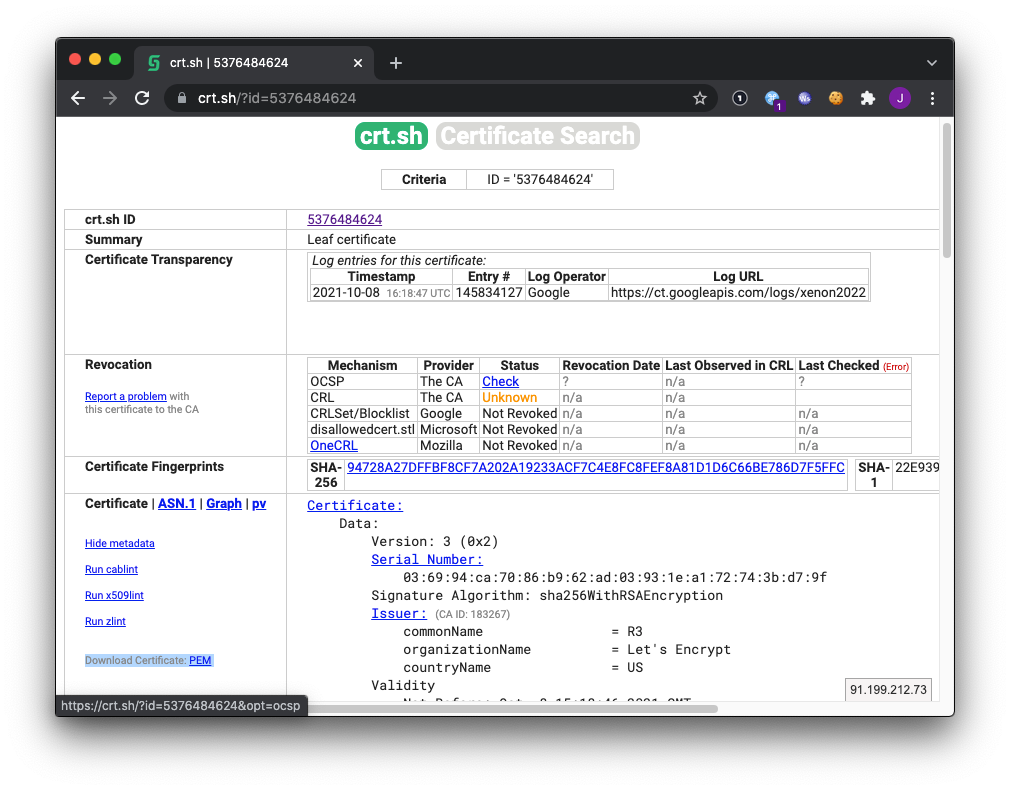
3) Click Download Certificate: PEM to download a plain text copy of the SSL certificate, which can be opened with any text editor.
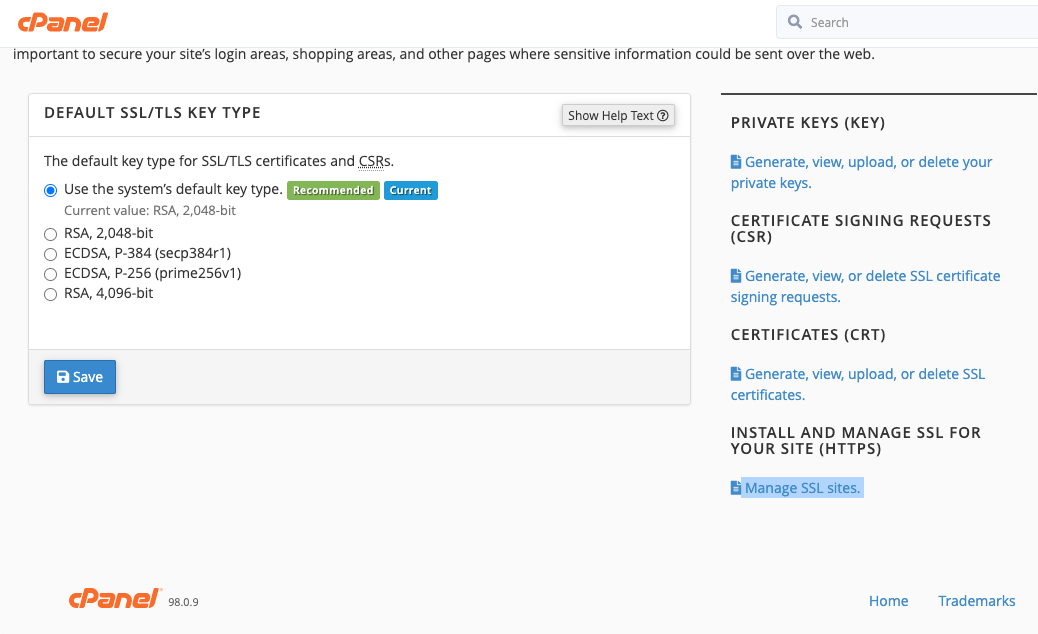
4) Navigate to the SSL/TLS page in cPanel (not ‘SSL/TLS Status’) and choose Manage SSL Sites:
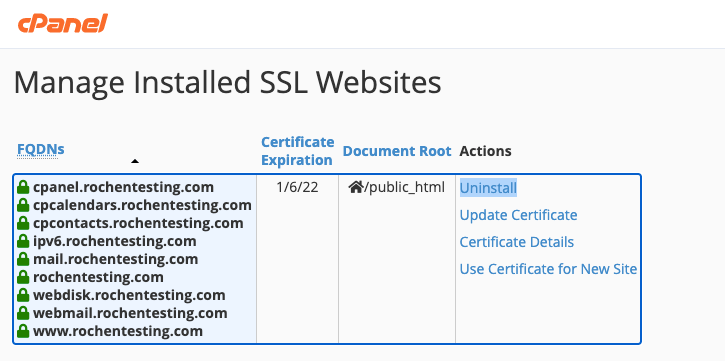
Your installed SSLs will be on the next page, with the option to Uninstall them if desired.
5) To re-install, first Uninstall the certificate.
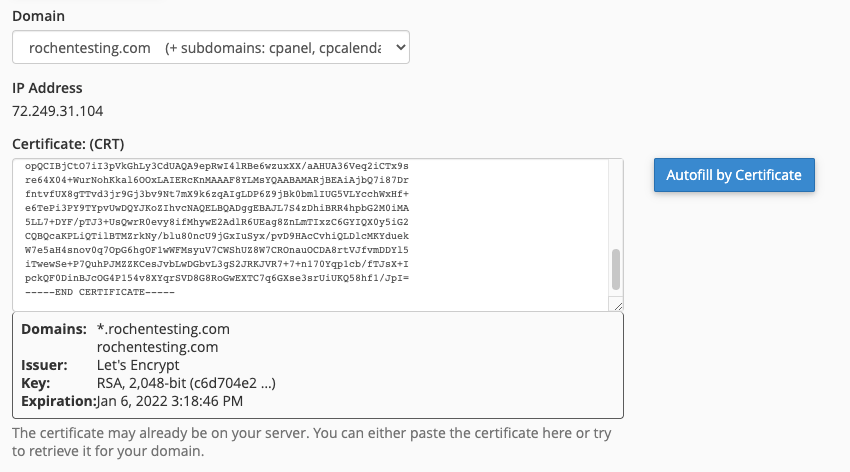
6) Fill in the contents of the ‘.pem’ file that you downloaded into the Certificate field. Click Autofill by certificate to automatically populate the other fields, including the private key.
7) To ensure this is re-downloaded by cPanel, and updated correctly, remove the auto-filled contents of the Certificate Authority Bundle.
8) Finally, click Install Certificate.
![]()
As a result, cPanel should now show the re-installed certificate at the top of the page.
Allow some time for the webserver to reload the updated virtual host, and then you can recheck the site over HTTPS.
If you run into any problems, please open a support ticket via your account at https://my.rochen.com, and we will be happy to assist further.